No Way, there’s a FIX for this?! Windows 7 – Resolution problem with Intel 915 – Apparently yes!

I am by no means a gadget-loving geek or an early adopter (or is is adapter?) of gadgetry. I have a tendency towards reticence when it comes to buying any kind of electronic equipment. And so it seems my eventual purchases have mostly been out of real necessity: do I need a Mac if I am doing Web development: yes. Do I need a PC if I am doing Web development:yes. Do I need a Blu-Ray DVD player so I can watch Netflix on my TV? Not really ( I did buy it for the mans birthday but I seem to be the only one who really uses it).

Anyway, enough with the preamble! I had an old Compaq PC tower(bought by the mans’ brother back in 2005) that used a new Compaq Q1859 monitor for the display (I used to have a NEC monitor then the mans bought me a widescreen HP HDMI widescreen monitor – sweet). On one side of my desk I have the Mac mini and the HP HDMI monitor – on the other side I had the elderly PC with the Q1859. I would develop my Web sites in Firefox, Chrome and Safari (Mac) and then safety-check them for cross browser support in Windows IE 6,7, 8 and other major browsers that Windows can run) on the PC. It was my simple system and it saved me from being one of those designers who never checks their sites in any other browser except the one they use because they don’t have the machine that can run it or can’t be bothered or just doesn’t think it matters – by the way, after loading my own recently re-designed site in IE8 in Windows 7 I’ve just caught some F**k-ups – yikes!

Then after about 2 days of not paying any attention to it, my PC wouldn’t turn on. It had no secondary on/off switch in the back – the power cord wasn’t the issue – an even older PC tower could use it. All of a sudden I was without a sure-fire way to check a site in IE and my client was reporting some rendering issues in IE and was kind of getting impatient … I begged for time and even though I could load the site in Chrome and basically see the same kind of issues as in IE (yet another reason to develop in Chrome, 1st) I needed to replace my PC, case closed. It’s just very distracting to lose half of your development system overnight.

After pricing refurbished Windows 7 laptops on overstock.com and tigerdirect.com and reading laptop reviews on cnet.com – I still really only needed a machine that could run Internet Explorer. I went on Craigslist and arranged to meet the seller of a Dell XPS M140 with Windows 7. I figured that the size of the laptop display didn’t really matter because I had the external Q1859… So I bought the Dell, took it home and plugged in my monitor. I got the VGA: No signal, Going to sleep message. I rebooted: the same message. Oops. Was this really happening? Seemed like I could not use my monitor with this laptop because of the video card driver. There’s a lot of info online about older Intel video drivers and Windows 7 and a bunch of folks unhappy with Intel for dropping them after only 3 years (or so I read on several forums) and if you research this topic you might get as discouraged as I did; it seems that there will never be an upgrade available from Intel. I was just getting used to the Dell’s 14 inch screen when I decided to look around online just one more time.

Before I did this I also ran a Windows Update since the seller had last updated in February. After I did my Devices listed the Compaq monitor, finally. Before it didn’t even recognize it existed.

Wow you are chatty. Is there a fix or not?

Well, I can’t swear it will work for everyone who has an older Intel model but the one I have is from 2006 and it worked for me.

I found this forum: Windows 7 – Resolution problem with Intel 915. I read the reassuring words of satanicdude and used TekBoi’s download link and followed InstallWizard. There was 1 minor hiccup just like I was warned about. But the driver installed the second time much like the way satanicdude said it would. I restarted Windows and saw the Windows start up screen on my Compaq Q1859. Additionally my laptop display automatically reset to 1280 x 800. Before it was stuck on a maximum resolution of 1024 x 768.

Still, everything is not perfect. My Compaq Q1859 auto detects the factory setting of a resolution of 1366 x 768 & from the Dell’s 1280 x 800 display it looks a little stretched out (but it did on my old PC) but it also doesn’t fill the monitor screen. Although at least now the Action Center no longer reports any issues with the Video Card!

Still no Aero though. But for now I am Ok.

And now I have 3 screens!

Update Re: stretched/squished screen appearance with external monitor/laptop combo.

If you also have a widescreen monitor determined to stick to a resolution that makes the desktop & Web pages look stretched or squished and/or displays pages in letterbox and not full screen, try this suggestion from our all caps loving friend. Don’t bother clicking the link at the top of the post, the YouTube video is not available.

How to tip: set a minimum amount before checkout in wp e commerce, part 1

With one of my current projects I was asked if I could set a minimum amount for customers to add to the cart before they could get to the checkout. FYI, I began the project when the wp e commerce plugin version was still 3.7.8, this is the version that the following template files reference:

cart_widget.php
shopping_cart_page.php
wpsc-includes/display.functions.php

File affected:cart_widget.php

Just to acclimate you to the area of the file we need to add to, in cart_widget.php at line 70 there is a form for clearing the cart. On line 77 begins the HTML for displaying the Go to Checkout link if any items are in the cart. What I did was just hijack this function to insert a conditional statement that unless the cart total is a minimum of 80.00 to show a little note about the cart minimum. Once the cart total is 80.00 then it can show the Go to Checkout link.

I hope it goes without saying that you can decide your own minimum amount simply by replacing any instance of 80 or 80.00 with your own number – anywhere you encounter it in any of the example codes.

[php]

<div class=’gocheckout’>

<?php $total = ($GLOBALS[‘wpsc_cart’]->calculate_subtotal() );
if($total < 80):
echo "<span class=\"total_nudge\">Checkout minimum is 80.00</span>"; endif;?>

<?php $total = ($GLOBALS[‘wpsc_cart’]->calculate_subtotal() );
if($total >= 80): ?>

<a href='<?php echo get_option(‘shopping_cart_url’); ?>’><?php echo __(‘Go to Checkout’, ‘wpsc’); ?></a>
<?php endif;?>

</div>

<?php else: ?>

<p class="empty">
<?php echo __(‘Your cart contains’, ‘wpsc’); ?> <span class="emptyisthecart"> <?php echo __(‘0’, ‘wpsc’); ?> </span> <?php echo __(‘items’, ‘wpsc’); ?>

</p>

<?php endif; ?>
[/php]

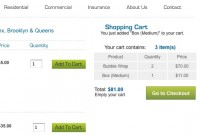
In the images you can see examples of the changes.


If you examine the 1st image you’ll see that I removed the continue shopping and go to checkout links from the Fancy Notification box. The reasoning was I did not want people to be able to click through to checkout and I also didn’t want to have to add new code to a core file so it was just easier to take out the links.

Editing core files of a plugin is usually not a good idea:upgrades will overwrite the changes that might be tricky to put back in while removing a few lines of HTML is much easier.

File affected: wpsc-includes/display.functions.php lines 146 to 155

[php]
function fancy_notification_content($cart_messages) {
global $wpdb;
$siteurl = get_option(‘siteurl’);
foreach((array)$cart_messages as $cart_message) {
$output .= "<span>".$cart_message."</span>";
}
$output .= "<a href=’".get_option(‘shopping_cart_url’)."’ class=’go_to_checkout’>".__(”, ‘wpsc’)."</a>";
$output .= "<a href=’#’ onclick=’jQuery(\"#fancy_notification\").css(\"display\", \"none\"); return false;’ class=’continue_shopping’>".__(‘X’, ‘wpsc’)."</a>";
return $output;
}[/php]

The easiest thing of all would be to not use Fancy Notifications although the option conveys to the customer that they’ve added an item to the cart and,depending on your shopping cart widget style or placement, this might not be so obvious. Just something to keep in mind.

Just doing this much took care of the client’s request. But that was not good enough for me, overachiever that I am I had to think ahead to what would happen if a customer had added enough to the cart to get to the checkout but then removed items and reduced their total below the minimum.

The solution is provided in part 2.

How to tip: set a minimum amount before checkout in wp e commerce, part 2

… This will make more sense if you’ve read part 1 about setting a minimum before checkout.

A solution for if a customer had added enough to the cart to get to the checkout but then removed items and reduced their total below the minimum.

I didn’t want to just get rid of the remove,update and quantity functions that the checkout page provides to customer for each product in their carts. I wanted to retain functionality of the shopping cart while enforcing the minimum for the cart total.

My plan was to continue to check if the cart total was at least 80.00 and if a customer went below that by using the remove, update or quantity options, another note about the minimum would appear and the rest of the checkout form would be hidden.

I hope it goes without saying that you can decide your own minimum amount simply by replacing any instance of 80 or 80.00 with your own number – anywhere you encounter it in any of the example codes.

File affected:shopping_cart_page.php
On line 88 – 89 of shopping_cart_page.php there’s the top of the form hook and the div for the forms.

[php]<?php do_action(‘wpsc_before_shipping_of_shopping_cart’); ?>
<div id=’wpsc_shopping_cart_container’>[/php]

I “hijacked” this section so I could put in my minimum total code:

[php]

<?php do_action(‘wpsc_before_shipping_of_shopping_cart’); ?>
<?php $total = ($GLOBALS[‘wpsc_cart’]->calculate_subtotal() );
if($total < 80):
echo "<br/><h2><span class=\"total_nudge-two\">Our Checkout minimum is 80.00</span></h2>";?>
<span class="checkout-total-label"> <?php echo __(‘Your Total is’, ‘wpsc’); ?>:</span> <span class="total_nudge"> <?php echo wpsc_cart_total(); ?></span><span class="total_nudge-two"><?php echo __(‘. Please re-adjust product amounts’, ‘wpsc’); ?> <a href='<?php get_option("product_list_url");?>’><?php echo __(‘ or return to the product list.’, ‘wpsc’); ?></a></span> <?php endif;?><?php echo __(‘ or return to the product list.’, ‘wpsc’); ?></a></span> <?php endif;?>

<div id=’wpsc_shopping_cart_container’ class="<?php $total = ($GLOBALS[‘wpsc_cart’]->calculate_subtotal() );
if($total < 80): echo "hidden"; endif;?>">

[/php]


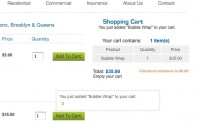
The 1st image shows the cart total meets the required minimum. The second image shows how the minimum note is displayed while hiding the forms. To do this all I did was use CSS to hide the entire form set in the div if the minimum was not met.

[css] .hidden .wpsc_checkout_forms {

display:none;

visibility:hidden;

}
[/css]

Make sure to place that line after the line that styles #wpsc_shopping_cart_container in your theme CSS file. I added visibility:hidden as an extra protection in case your theme sets display:block on the div style, visibility:hidden will override that.

Ok, that about does it. I hope this tutorial set was helpful to you. Good luck with your projects!

How to TIP: Customizing Xsilva Lightspeed Web Store

If you’re given the assignment to customize Web Store you might start out with the feeling that you are limited in what you can do as far as Web Store’s templating system goes.
We all know by now that each tpl.php in each template package – Deluxe or Framework – is included by one main file: index.tpl.php. That means that this file runs the whole show for every section of the online store. This means that if you add a block to index.tpl.php and you don’t know how to use PHP to hide it and you don’t want it to show on every section, it will.

Luckily, we can use the unique form ID that Web Store creates for Categories, Products, Cart and Checkout and more.
Because the form element that generates a unique ID is listed in the document right after the body element we can use it like we would use a unique id or class in the body element.

  • List of XLSWS Form IDs:

  • #xlsws_product = a single product details page
  • #xlsws_category = a single category page
  • #xlsws_cart = the edit cart page
  • #xlsws_checkout = the checkout page
  • #xlsws_gregistry = a single wishlist page
  • #xlsws_myaccount = an account page
  • #xlsws_custom_page = a single custom page
  • #xlsws_sitemap = the site map page
  • #xlsws_contact_us = the contact us page

Practical application:

Say you’ve got a block of content and you added it to index.tpl.php but for whatever reason you don’t want this content to show on a single product details page.

You could add this to webstore.css

[css]
#xlsws_product #block-you-dont-want-toshow {display:none;}
[/css]

Try it out for yourself & good luck with all your projects!